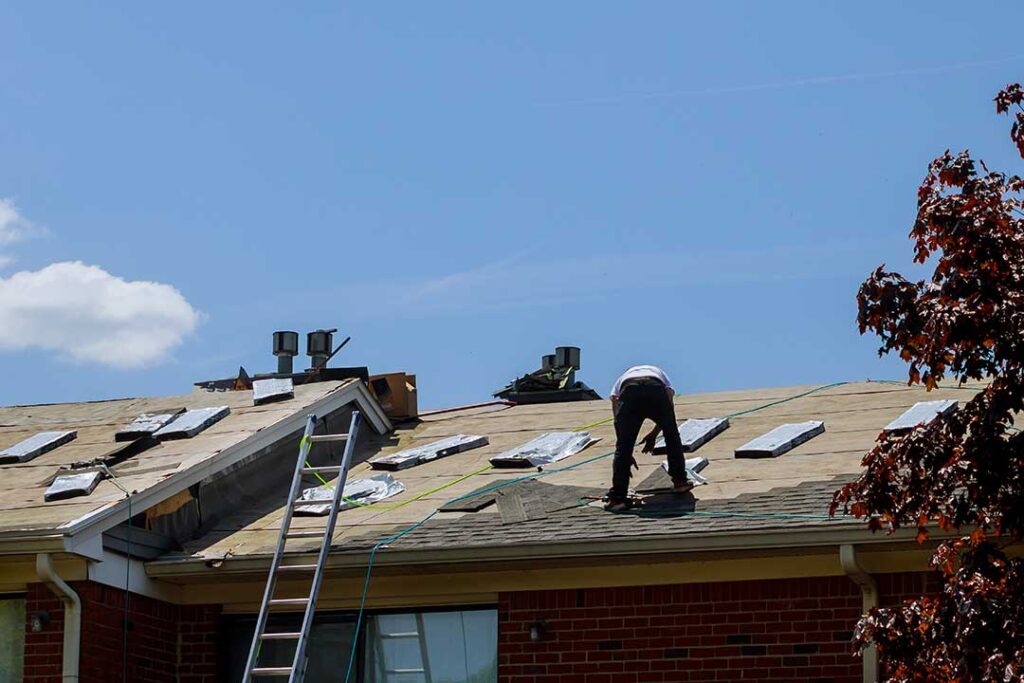
Roof penetrations are any openings or objects that pass through a roof surface, such as plumbing vents, chimneys, skylights, exhaust fans, antennas, and mounting hardware. These areas are more vulnerable to leaks because roofing materials must transition around an interruption rather than forming one continuous surface.
Proper sealing depends on more than applying caulk around the opening. A durable repair or installation requires the correct flashing, compatible materials, sound attachment, and careful attention to how water moves downhill across the roof.
Why do roof penetrations leak?
Most roof penetration leaks occur because water is being directed around the opening incorrectly or because a sealing material has failed. Common causes include:
- Cracked or dried-out sealant
- Damaged or rusted flashing
- Missing back pans or side flashing
- Loose fasteners
- Improperly installed pipe boots
- Roofing materials cut too tightly or too widely
- Ice and snow movement
- Wind-driven rain entering beneath an exposed edge
- Repairs made over wet, dirty, or deteriorated surfaces
A roof penetration may not leak directly below the opening. Water can travel along roof decking, rafters, insulation, or interior framing before appearing as a ceiling stain. That makes the visible leak location an unreliable guide to the actual source.
What is the correct way to seal a roof penetration?
The correct method is to use a flashing system that sheds water, then use sealant only where it is designed to provide secondary protection. Sealant alone is not a substitute for flashing.
A typical process includes:
1. Inspect the penetration and surrounding roofing.
2. Remove loose, cracked, or failed materials.
3. Check the roof deck and framing for moisture damage.
4. Install or repair the appropriate base flashing.
5. Integrate the flashing with the roofing layers in the direction of water flow.
6. Seal approved joints and fastener locations with compatible material.
7. Test the area carefully after the work is complete.
The flashing should overlap in a shingle-like manner. Upper materials should lap over lower materials so rain and melting snow flow across the surface rather than behind the flashing.
How should plumbing vent pipes be sealed?
Plumbing vent pipes are commonly sealed with a roof flashing boot. The boot has a base that sits over or under portions of the roofing and a flexible collar that fits around the pipe.
For a proper installation:
- The pipe should be stable and free of movement.
- The flashing boot must match the pipe diameter.
- The base should lie flat without buckling the surrounding shingles.
- The upper portion of the flashing should be integrated beneath the roofing course above it.
- The lower portion should remain exposed enough to direct water outward.
- Fasteners should be placed where the flashing manufacturer allows and sealed appropriately.
- The collar should fit snugly without being stretched, crushed, or cut excessively.
A common misconception is that a large amount of roofing cement around the pipe makes the installation more secure. Excess cement may hide a problem temporarily, but it can crack, shrink, or separate from the pipe and roofing as temperatures change.
Cold winters and repeated freeze-thaw cycles can make brittle pipe boots fail faster. A boot that looks intact from the ground may still have small splits around the collar or corners.
What is needed around chimneys and masonry penetrations?
Chimneys and masonry walls usually require several flashing components rather than one bead of sealant. These may include step flashing, counterflashing, base flashing, and a back pan or cricket on larger installations.
Counterflashing is especially important. It is inserted into or secured to the masonry and overlaps the lower flashing so water cannot run behind it. Mortar joints, rather than loose masonry faces, are generally used for properly placed counterflashing where the construction allows.
A chimney without effective upper-side protection can collect water and debris. Larger chimneys may need a cricket or saddle on the uphill side to divide water and reduce pooling. Sealant at masonry joints can be useful in limited locations, but it does not replace properly formed metal flashing.
Because chimneys involve masonry, roofing, and sometimes fire-related clearances, repairs may require more than surface sealing. Crumbling mortar, displaced masonry, or interior dampness should not be covered with sealant before the underlying condition is understood.
How are skylights, vents, and roof-mounted equipment sealed?
Skylights generally rely on a manufactured flashing kit matched to the specific unit and roof type. The flashing must be installed in the correct sequence, with the sill, side, and head pieces overlapping properly. Improvised patches around a skylight frame often fail because they do not account for movement and drainage.
Roof exhaust fans and powered vents also require a curb or flange that is integrated with the roofing. The uphill side deserves special attention because water and snow can collect there. A raised curb may need additional protection against drifting snow or ice movement.
For antennas, satellite equipment, solar-related hardware, and other mounted items, the most reliable approach is to avoid unnecessary roof penetrations when possible. Where penetration is necessary, the mounting system should use properly designed flashing rather than relying on exposed screws and sealant.
Fasteners driven through the roof surface are potential leak points. A screw head covered with sealant may remain watertight for a period, but movement, corrosion, and weathering can eventually create an opening.
Which sealants are suitable for roof penetrations?
The correct sealant depends on the roofing material, flashing metal, temperature, and exposure. Common roofing sealants include compatible polyurethane, silicone, and other elastomeric products, but no single sealant works for every roof.
A suitable sealant should:
- Adhere to both surfaces being joined
- Remain flexible through seasonal temperature changes
- Resist ultraviolet exposure
- Be compatible with the roofing membrane or shingles
- Avoid staining or damaging adjacent materials
- Remain workable in the conditions during installation

Surfaces should be clean, dry, and free from dust, oil, loose granules, and old material that no longer bonds. Applying new sealant over a failing layer often creates the appearance of repair without restoring a reliable bond.
Roof cement may be appropriate for specific asphalt roofing details, but it should not be used as a universal adhesive or waterproof coating. Manufacturer instructions and the roofing system’s requirements should control material selection.
What seasonal conditions matter in Victor?
Weather affects both the installation and the life of a roof penetration seal. In Victor, freeze-thaw cycles, winter snow, spring rain, summer heat, and strong wind can all test flashing details.
Several conditions deserve attention:
- Sealants installed on damp or frozen surfaces may not bond properly.
- Snow and ice can hide damaged flashing during winter inspections.
- Rapid melting can send large amounts of water toward roof penetrations.
- Ice movement may stress pipe boots and exposed flashing.
- Summer heat can soften some materials and accelerate aging.
- Wind can lift loose flashing edges or drive rain beneath small gaps.
A visual inspection from the ground may identify obvious damage, but it cannot confirm whether hidden laps, underlayment, or roof decking are dry and secure.
When is a roof penetration unsafe to repair personally?
Simple ground-level observation and minor maintenance may be reasonable, but roof work becomes hazardous when surfaces are steep, wet, icy, fragile, or difficult to access. Skylights are particularly dangerous because some are not designed to support a person’s weight.
Extra caution is needed around:
- Overhead electrical lines
- Brittle roofing or aging skylights
- Steep slopes
- Snow-covered surfaces
- Loose chimney masonry
- Unstable ladders
- Hidden roof damage
- Penetrations near electrical, heating, or ventilation equipment
A leak involving extensive ceiling damage, suspected mold, wet insulation, structural deterioration, or electrical fixtures requires prompt attention for safety reasons. The roof opening may be only one part of a larger building problem.
How can roof penetration leaks be prevented?
Prevention begins with routine observation and timely maintenance. After major wind, heavy snow, or repeated freeze-thaw weather, look for displaced flashing, cracked sealant, missing shingles, damaged pipe boots, and water marks in attic spaces.
Inside the attic, darkened wood, damp insulation, rusted fasteners, or daylight around a penetration can indicate a problem. Attic ventilation should also be considered because condensation can resemble a roof leak, especially during cold weather.
The most durable roof penetration is one that is planned, flashed correctly, kept free of unnecessary openings, and inspected before small defects become concealed water damage. Sealing is part of the system, but proper drainage and flashing do most of the work.